
All authors of accepted and registered papers for MedComNet 2021 are required to upload a pre-recorded video of their paper presentation.
For each paper, the session chair will play your pre-recorded video. You will then be introduced by the session chair and there will be questions and answers on your presentation.
We request you to prepare and upload a video of your presentation, comprised of a brief introduction with webcam, if desired, followed by voice over slides for your presentation. This is a requirement for your paper to appear in IEEE Xplore. Please note that the file must be a video file in MP4 format (more details below). Please do not try to upload Powerpoint or PDF files. The presentation can be recorded by any of the co-authors.
In order for videos to be verified by the technical program committee, please finalize and upload your video by: June 1st, 2021.
There are several video conferencing tools available to easily record a presentation. In this method, you can show your face via webcam (if you’d like) and display your slides as you talk. You can use any meeting software as long as you get a good quality recording and your final file is in the MP4 format. Here are some links to instructions on recording a meeting on common platforms. Later on, we provide you with instructions for OBS Studio:
- WebEx:Video Conferencing – Record a Cisco Webex Meeting
- Skype: Skype for Business: Recording a Meeting | Information Technology Services | Bemidji State University
- Google Meet: Record a video meeting – Meet Help
- Zoom: Local Recording ? Zoom Help Center
- Gotomeeting: How to Record a GoToMeeting Session | Techwalla and How to Convert and Open the GoToMeeting Recordings
- Microsoft Teams: Record a meeting in Teams – Office Support
Uploading Your Video
Please keep in mind the following time slots (EDAS will prevent you from uploading videos longer than the indicated times!):- Full papers: Please keep your presentation within 15 minutes
- Short papers: Please keep your presentation within 10 minutes
Instructions for uploading the video:
- Go to EDAS
- Go to My… >, My Papers
- Click on your paper title
- Upload your MP4 video file to your paper record via the “Video-presentation of accepted paper” option
File Format
- All files must be in MP4 Format
- Less than or equal to 1Mbps bitrate: To check the bit rate, right click on the file name, click on properties, go to the details tab, and look for total bitrate.
- Resolution either 720p or 1080p HD and use an MP4 video format with H.264 (or optionally H.265) codec. Please do not prepare 4K or 60fps videos as they consume unneccessary bandwith. Do not use other video codecs that might not work on participants’ computers.
- Please use the following naming convention: PID.mp4, where PID is your paper ID as recorded on EDAS.
Tips for Recording
- Use as quiet an area as possible
- Avoid areas that have echo
- Rooms should be fairly small
- Sound dampening with carpeting, curtains, furniture
- If not recording locally using OBS studio, hardline internet connection recommended, but if unavailable, a strong Wi-Fi connection
- Good headset with microphone close to mouth BUT away from direct line of mouth to reduce “pops”. Avoid using default built-in microphone on computer.
- Do a test recording of a couple of minutes and review the sound and picture quality, MP4 format, and bit rate before recording the entire presentation. Make adjustments if needed.
Instructions for OBS studio
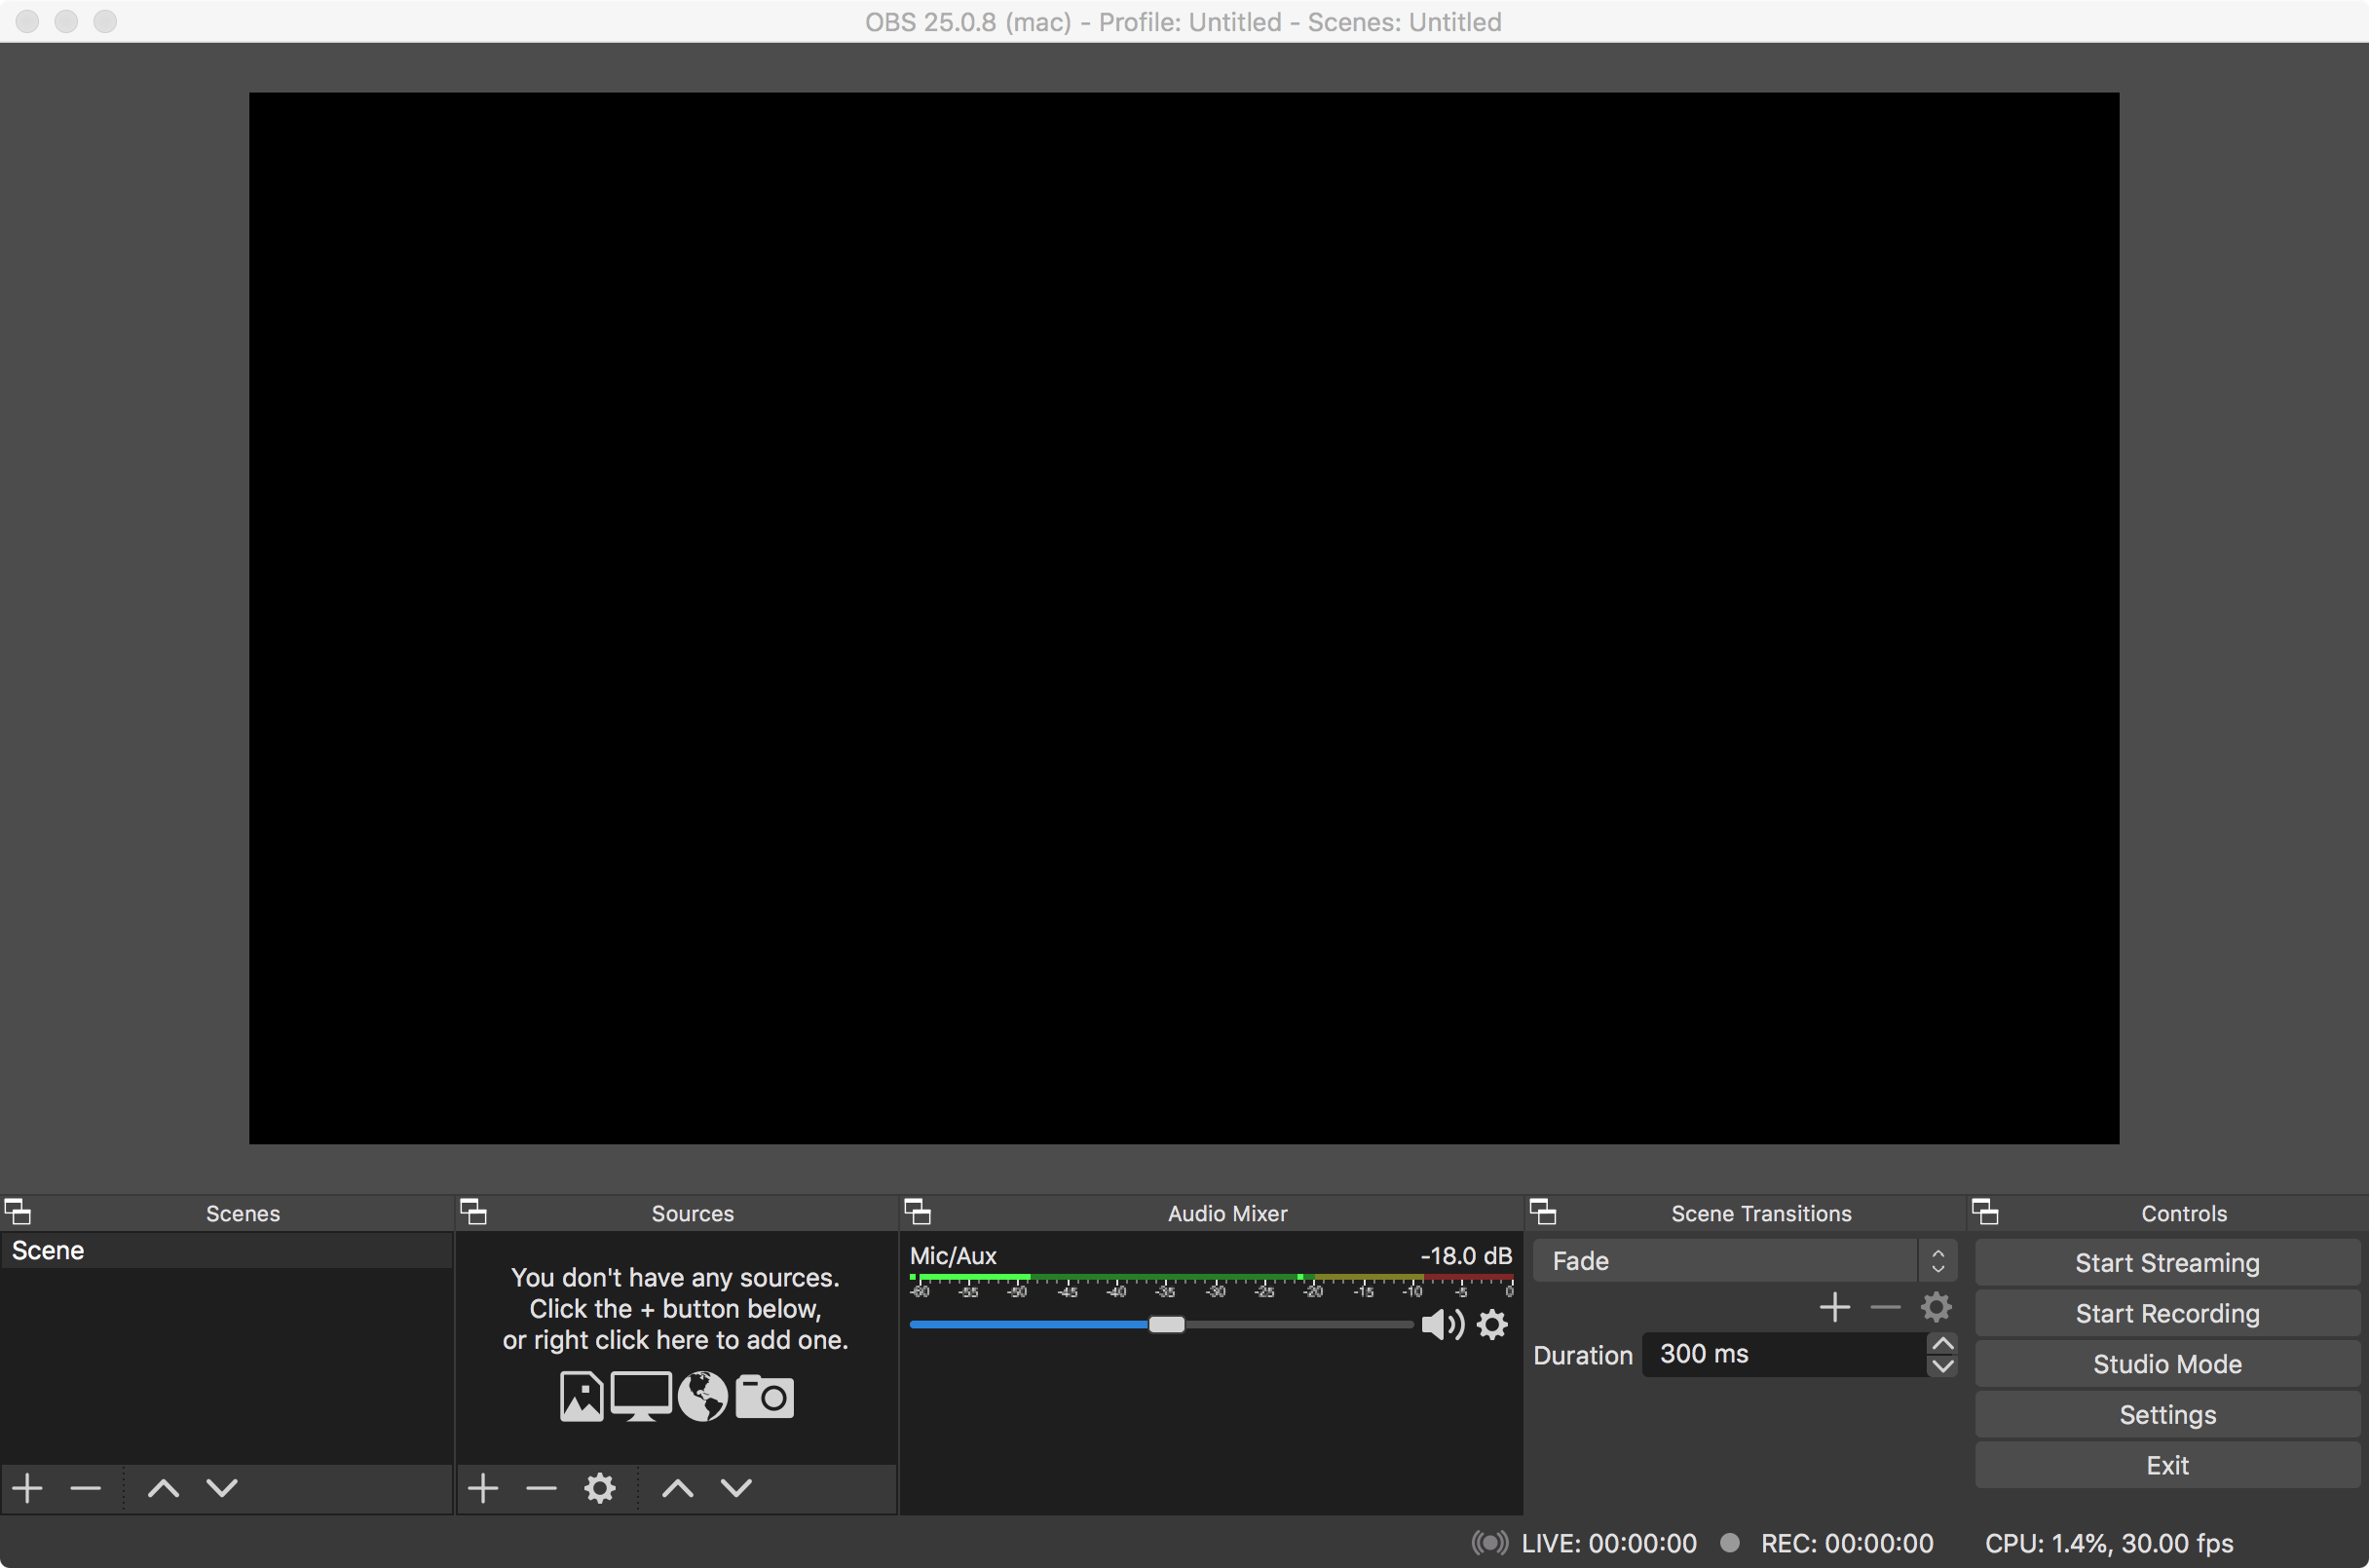
To record your presentation you are free to use the software that you prefer, but we recommend using OBS Studio. OBS studio is a free, multi-platform software for video recording and live streaming. It is particularly useful for recording presentations because it can capture a window of your screen (your slides), your webcam, and, of course, your voice. In the following, we provide you with some simple tips for recording your presentation with OBS studio, if you have never used it.
The first time you open OBS, run the autoconfiguration wizard. Choose the settings optimized for recording, not for streaming, and click “Next”. In the following settings, simply leave the default ones, which should be ok for the purpose. After completing the setup wizard, open the settings (“Preferences”) and choose the “Video” section. Change both the “Base” and the “Output” resolutions to 1920×1080 (FullHD). In addition, in the “Output” section, “Recording” tab, please set the Keyframe interval to 1. Then click on “OK” to apply the settings. You are now ready to setup the recording.
In the main window you see the preview (above) and the controls (below).
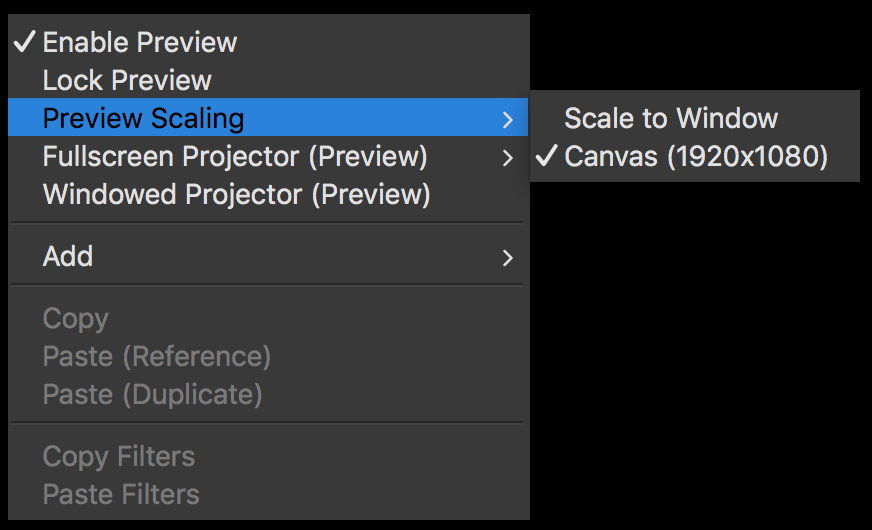
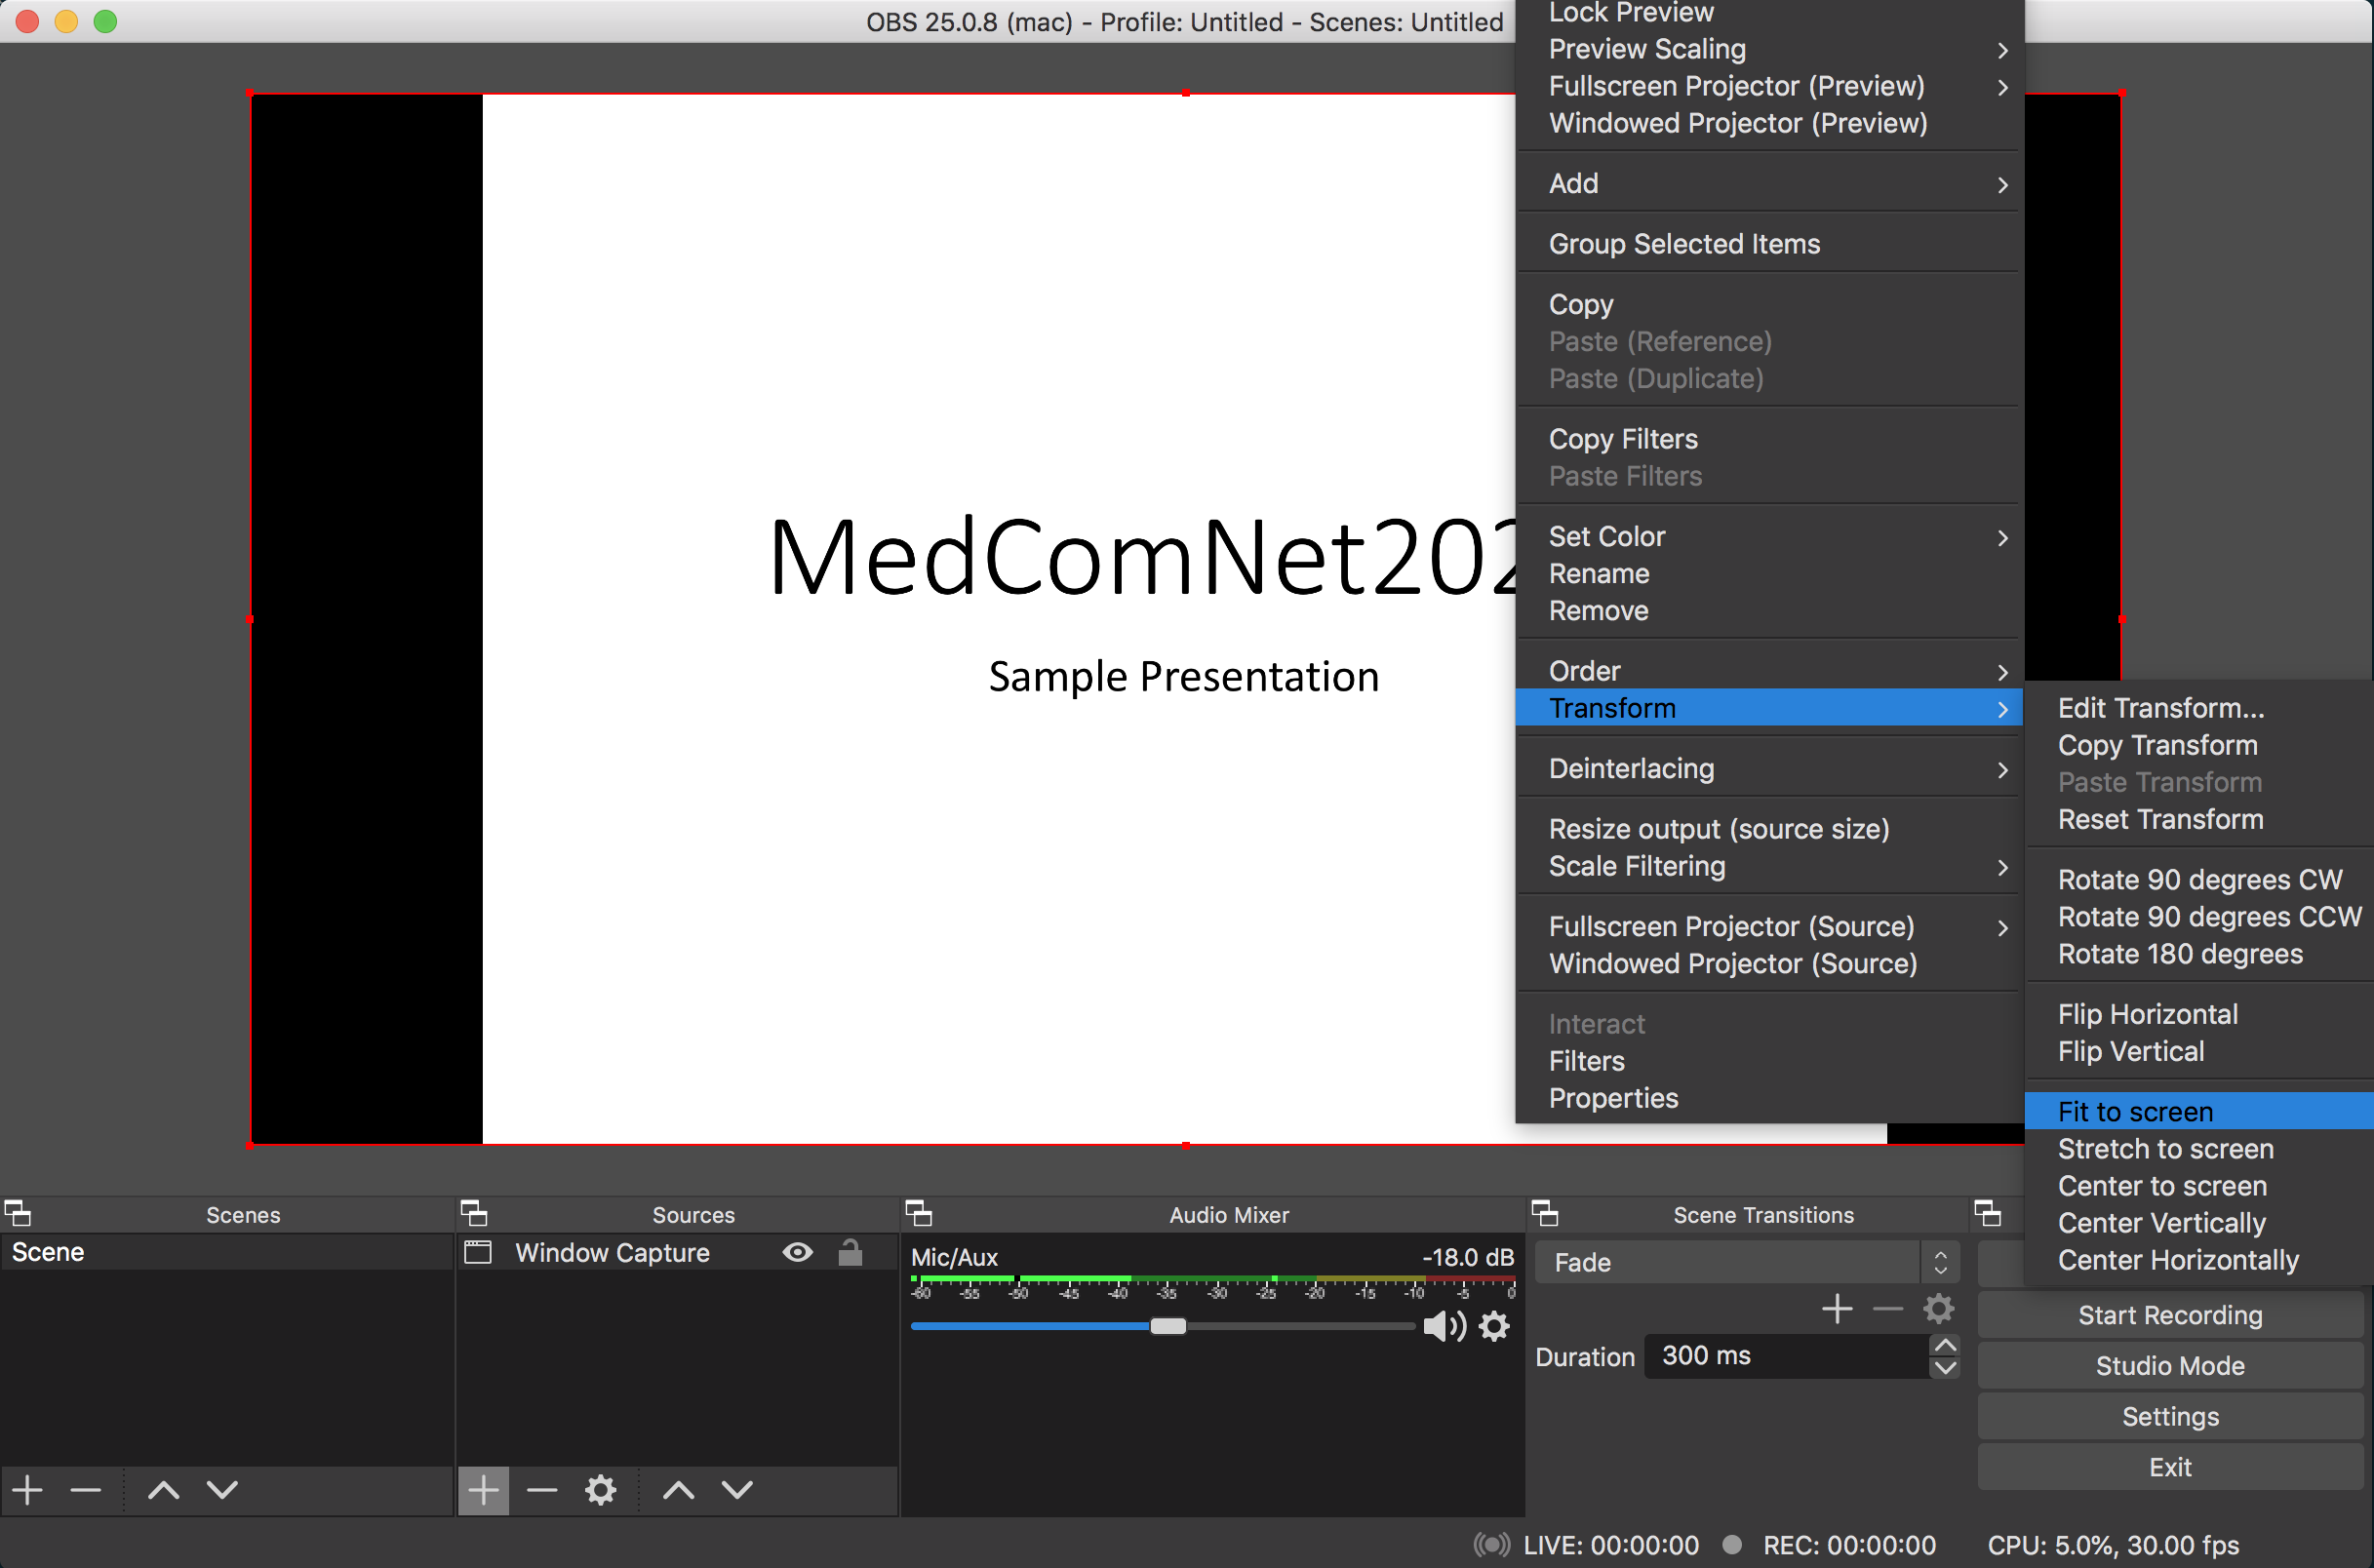
Before starting the setup, right click on the preview, scroll to “Preview Scaling” and choose “Canvas (1920×1080)”.
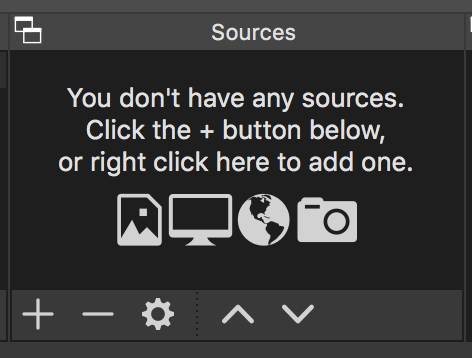
The next step is to setup the sources to be recorded. First, we need to tell OBS to record the slides. To do so, open your slides (Power Point, PDF, or any other tool) and switch to presentation mode, to have the slides full screen. Switch back to OBS and in the “Sources” panel add a source by clicking on the “+” button.
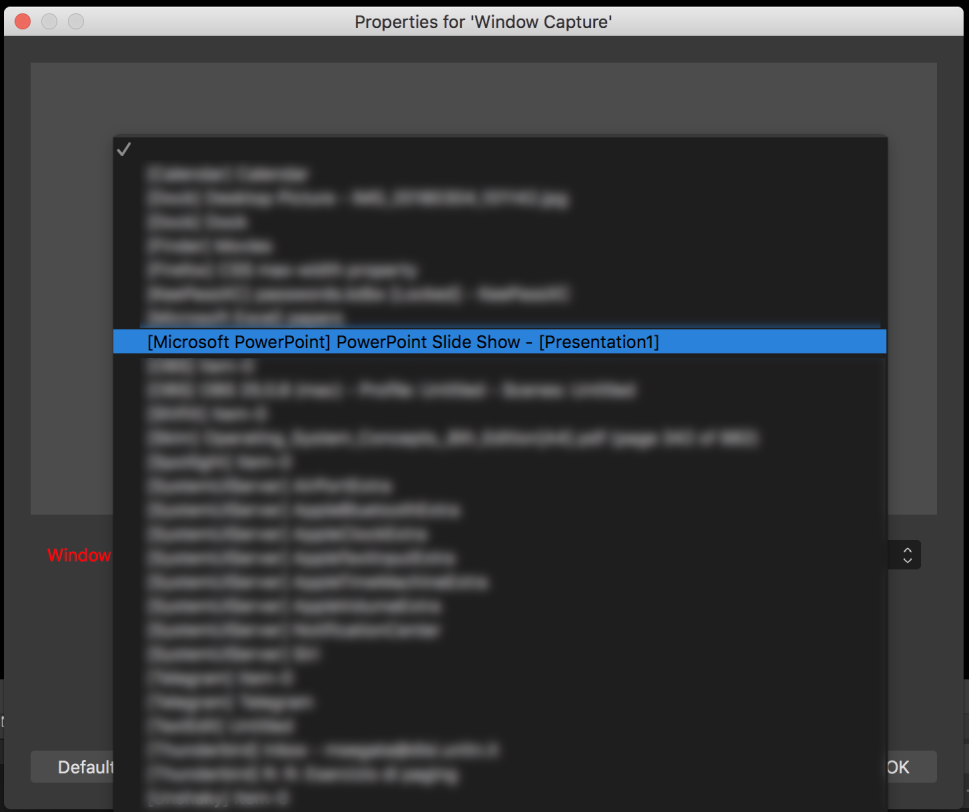
To record the slides, choose the “Window Capture” source. A window will open, asking you some parameters. Simply leave the default ones and click on “OK”. A new window will open, which can be used to choose which window OBS should record. In the “Window” drop-down menu, select the window of your full-screen presentation and click “OK”.
You should now see your first slide in the preview window. The size of the slide might not match the preview window: simply right-click on the slide inside the preview, go to “Transform” and click on “Fit to screen”.
The next source to add is the webcam, to record your face while you are talking. While this is not strictly necessary, it makes the presentation less impersonal and more enjoyable. To add your webcam, add a new source by clicking on “+” in the “Sources” panel and choose “Video capture device”. In the first prompt window, simply leave the default parameters and click “OK”, while in the second window you have to choose the device (your webcam). Click on “OK” and you should see your webcam preview inside the OBS preview. You can now drag and resize the webcam to position it where it doesn’t cover too much of your slides (usually in a corner). You can also move the slides to the left of the recording instead of keeping them centered, so that you have more space for the webcam and you can avoid overlapping. The order in which you add the sources also determines the layering, i.e., the last source you add will be put on top. In case you need to move a source with respect to the anothers, simply right click on the source in the preview and move it up/down/top/bottom using the “Order” sub-menu. The final setup should look as follows.

You are now ready to record your presentation. Before recording your presentation do first a test by simply clicking on “Start recording” in the bottom right corner. Switch to your presentation, try to say some phrases and change some slides. Then switch back to OBS and click on “Stop recording”. To view the recorded video, click on “File”, “Show recordings”. This will open the folder where recordings are stored. In the folder you will find an “.mkv” video. If the video and audio quality is satisfying, you are ready to record your presentation.
This is just a basic tutorial to register a simple presentation, OBS is a professional tool, and lets you design your video in countless ways, feel free to explore all possibilities you think will make your presentation more appealing.